Recap
Get Craftly started as a side project for my other side projects. I wanted a board where every project could have its own lane, with cards moving through Planned, WIP, and Done. At the same time, I wanted to run an experiment: how far could I get without manually writing the application code and without already knowing React or Tailwind CSS?
The answer turned out to be considerably further than I expected. What began as a screenshot and a conversation with an AI assistant is now a Firebase-hosted application with authentication, persistent boards, an admin dashboard, automated tests, and more than one hundred commits.
The initial idea
The starting point was the mockup below. It already contained the central idea: a horizontally scrolling board made from project lanes, three workflow rows inside every lane, and task cards carrying useful details such as priority, tags, and dates.
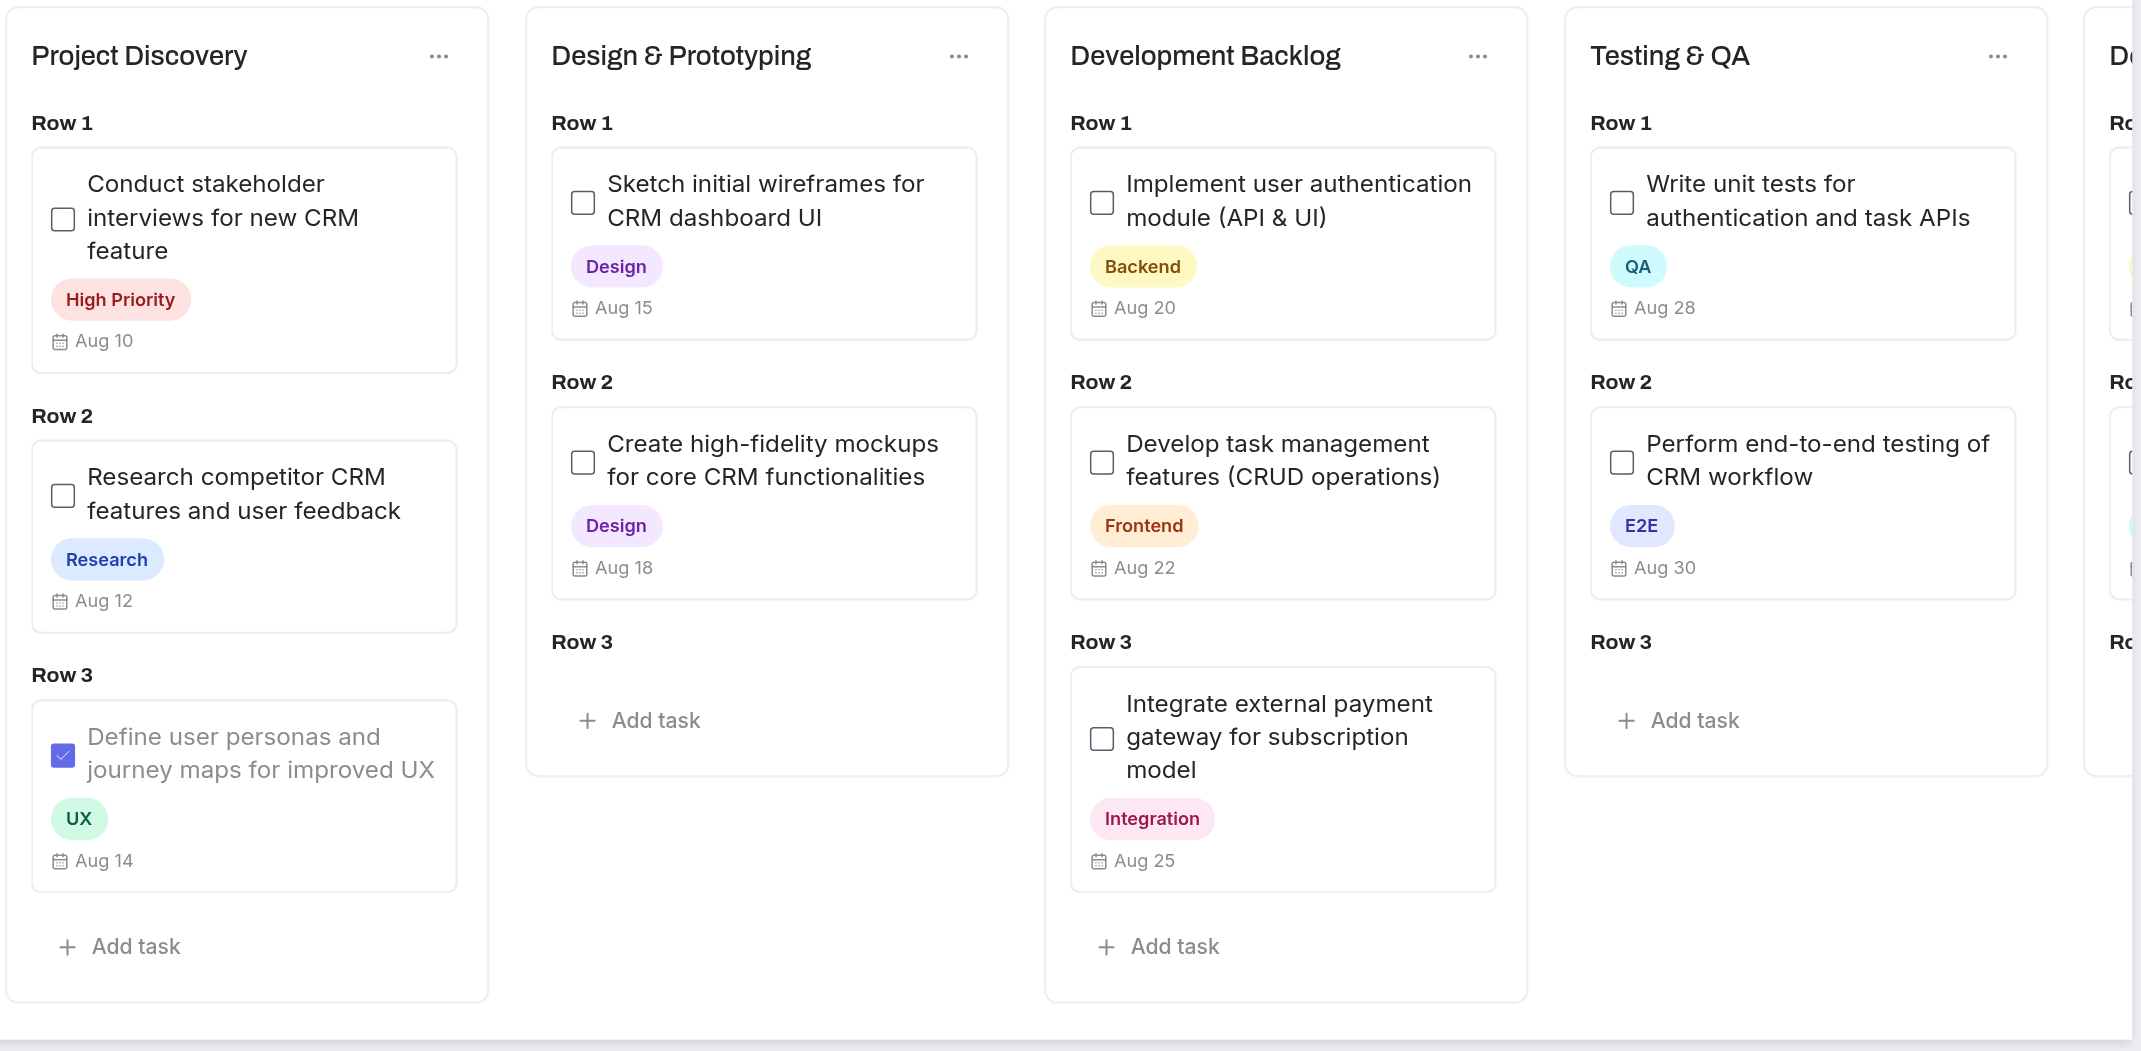
My initial requirement was intentionally visual and practical. Cards had to move between lanes and rows, drop targets had to react while dragging, completed work had to remain recognisable, and the layout had to survive a board wider than the screen.
First implementation
I began with Claude’s free web interface. There was no IDE integration and no coding plug-in. I described the interface, supplied the mockup, copied the result into the project, and reported the next problem. Tailwind CSS 4 had changed enough to create some confusion during setup, so Gemini provided a little help there.
The first version was a React application created with Vite and styled with Tailwind CSS. It proved that the board itself worked: lanes could be displayed side by side, cards could be dragged, and the interface could keep the original three-row structure.
That first success was also the start of the real work. A board that merely looks correct is not yet useful. Titles needed in-place editing; lanes and cards needed to be created and removed; cards needed tags, colours, priority flags, dates, and completion behaviour. Each improvement exposed another small edge case.
Making the board useful
The current interface is still recognisably based on the original mockup, but it has grown into the board I now use for real projects.
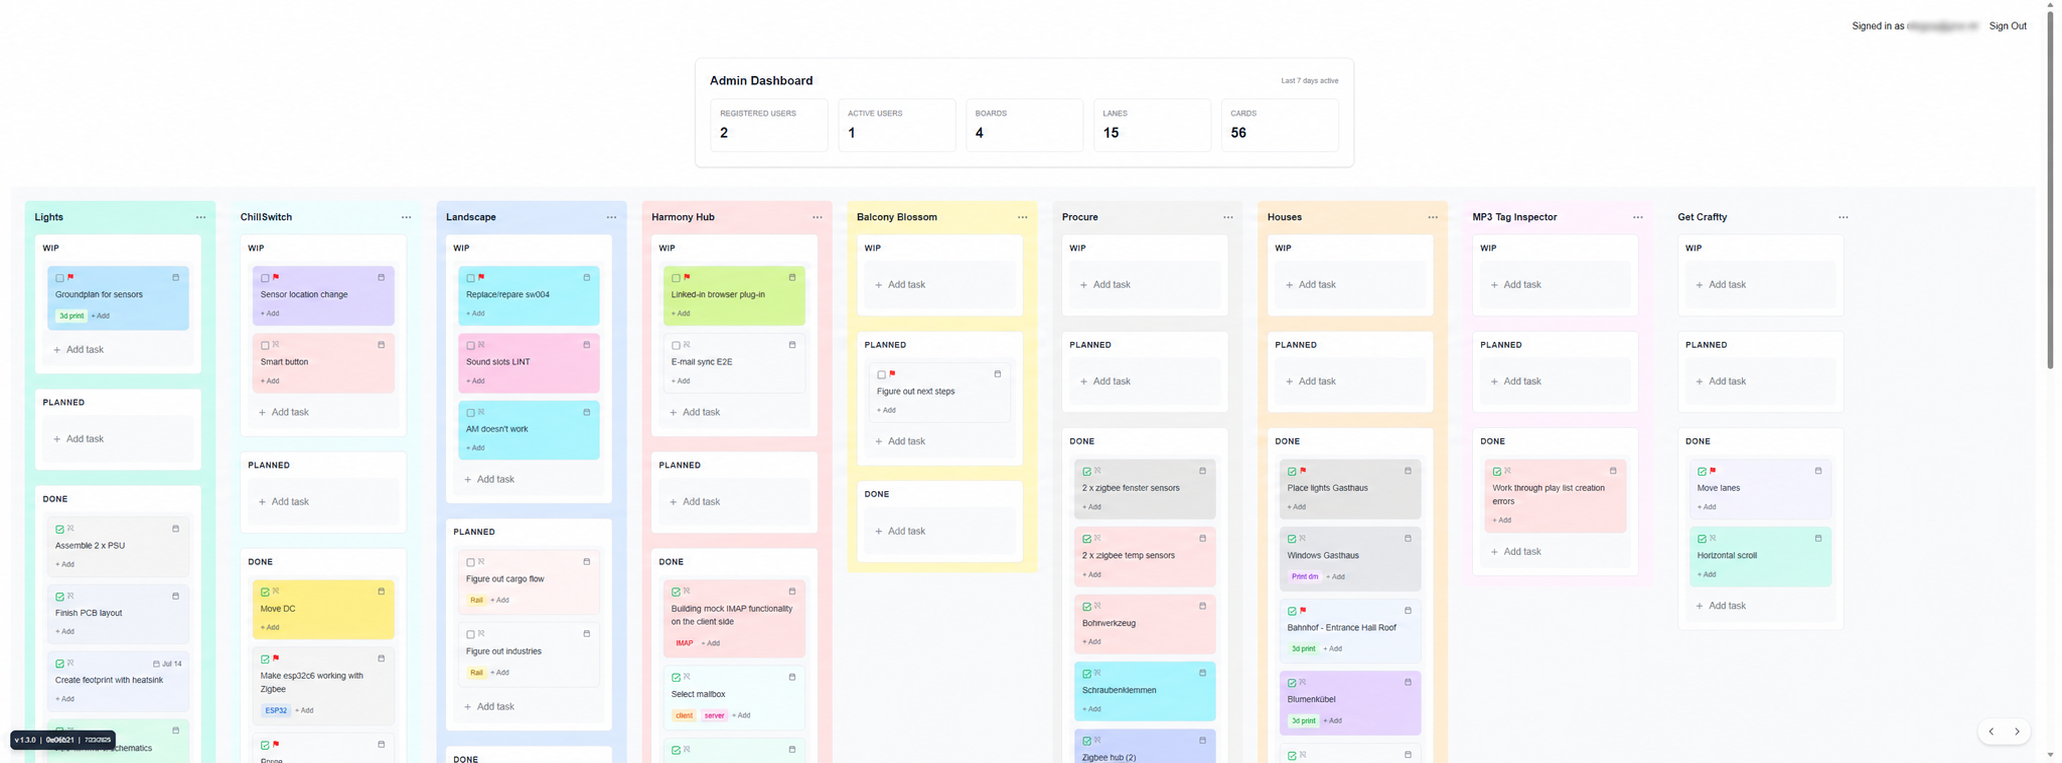
Every lane represents a project or area of work. Inside it, cards move between Planned, WIP, and Done. A card can have a due date, a priority flag, one or more coloured tags, and a completion state. Titles are edited directly on the board instead of through a separate form.
- Drag cards between rows and lanes while preserving their order.
- Add, rename, reorder, and remove project lanes.
- Create cards directly in the required workflow row.
- Use tags, muted card colours, priority flags, and due dates as visual cues.
- Move completed work automatically into Done.
- Scroll horizontally through a board containing many projects.
The screenshot also shows the admin overview. At the time of writing, the hosted instance reports two registered users, four boards, fifteen lanes, and fifty-six cards. These are not demonstration records—the application is being used to organise work on my other projects.
Creating a card, step by step
A feature list describes what the application can do, but it does not show how it feels to use. The following sequence creates a real demonstration card in the Get Craftly lane.
The complete flow stays on the board: choose the workflow row, type a title, then enrich the card only when the extra information is useful.
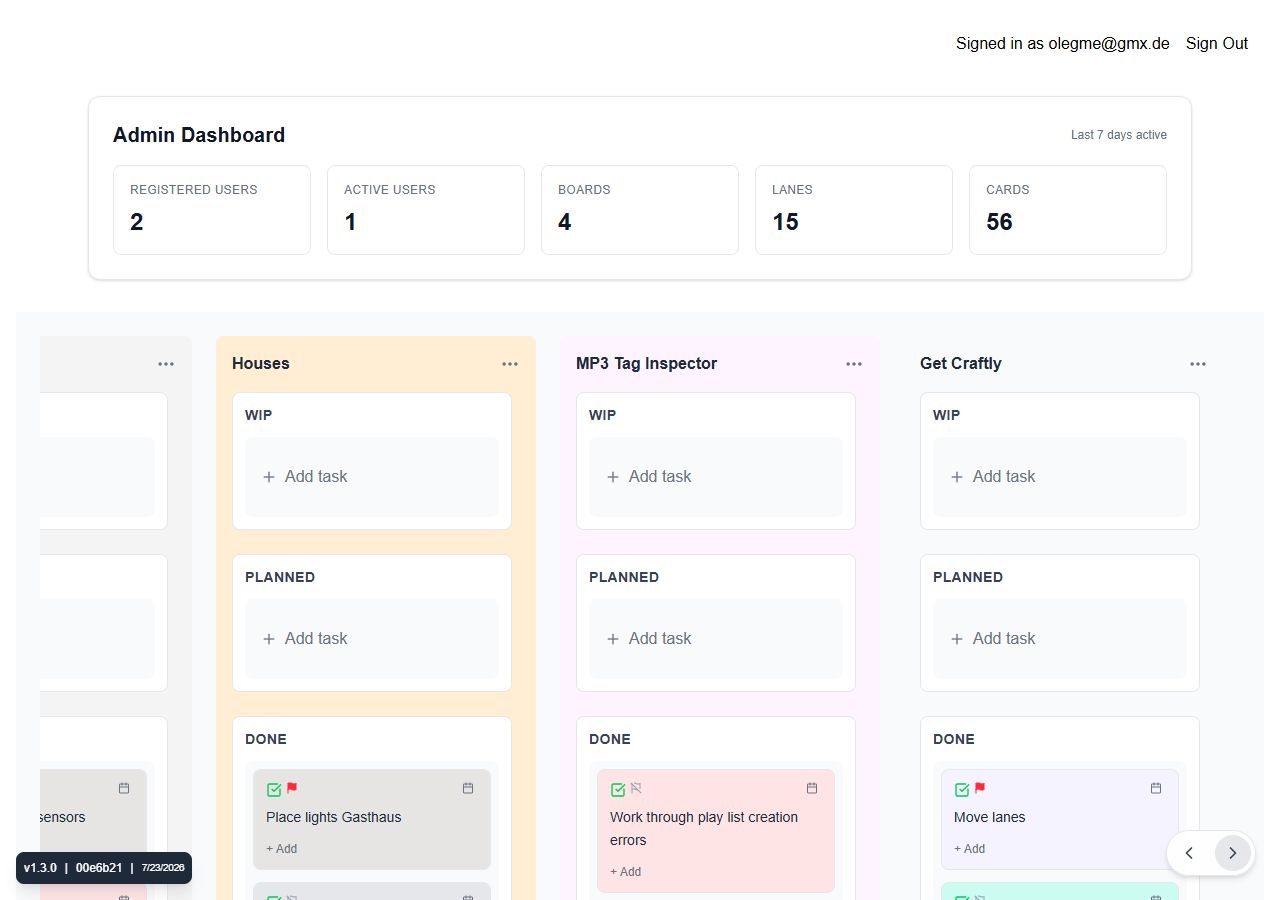
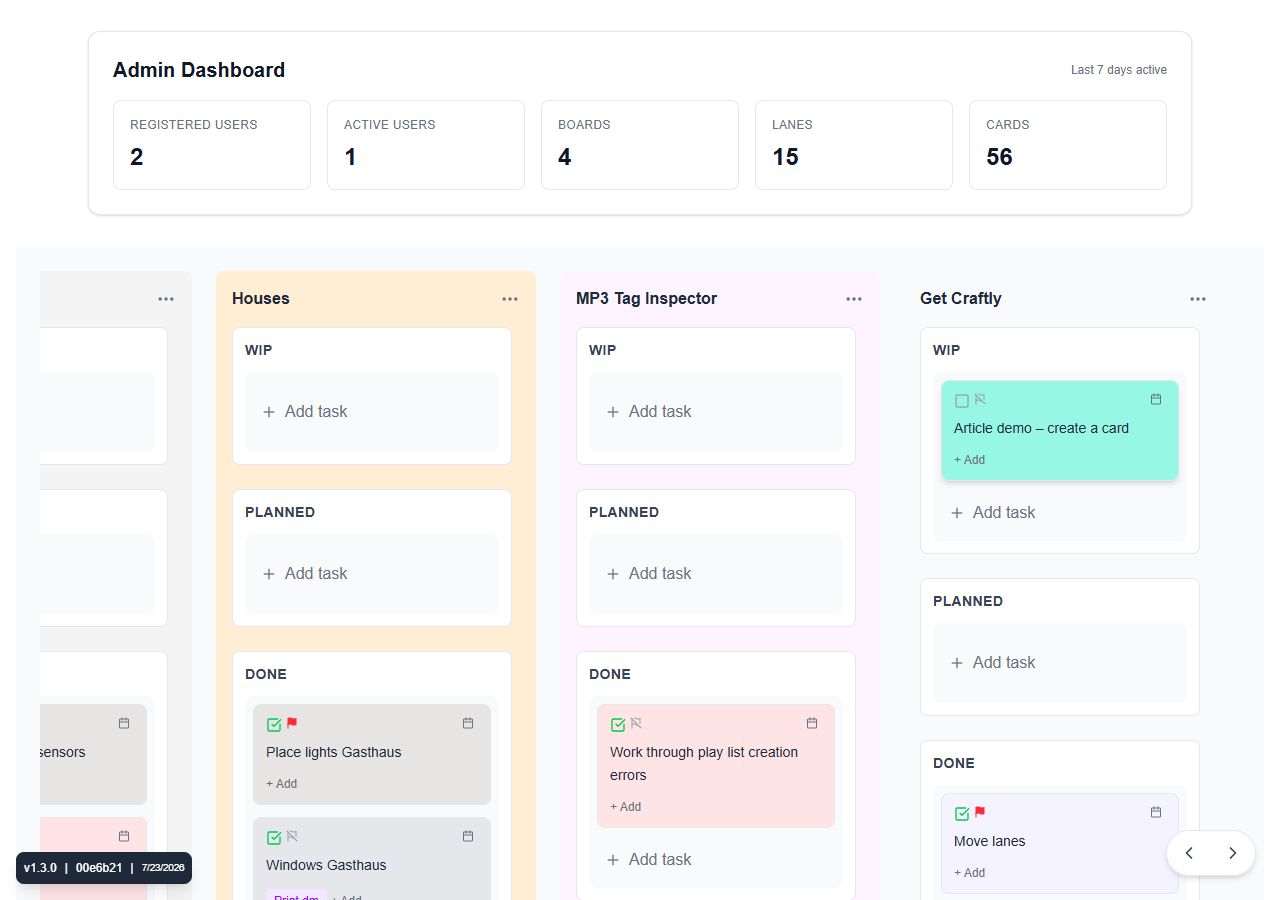
1. Start in the right workflow row
Every lane has its own WIP, Planned, and Done areas. Each area has an Add task action, so a new card starts exactly where it belongs rather than being created in a separate screen and moved afterward.
2. Enter the card title
Clicking Add task expands a deliberately small form inside the selected row. For this walkthrough I created Article demo – create a card directly in WIP.
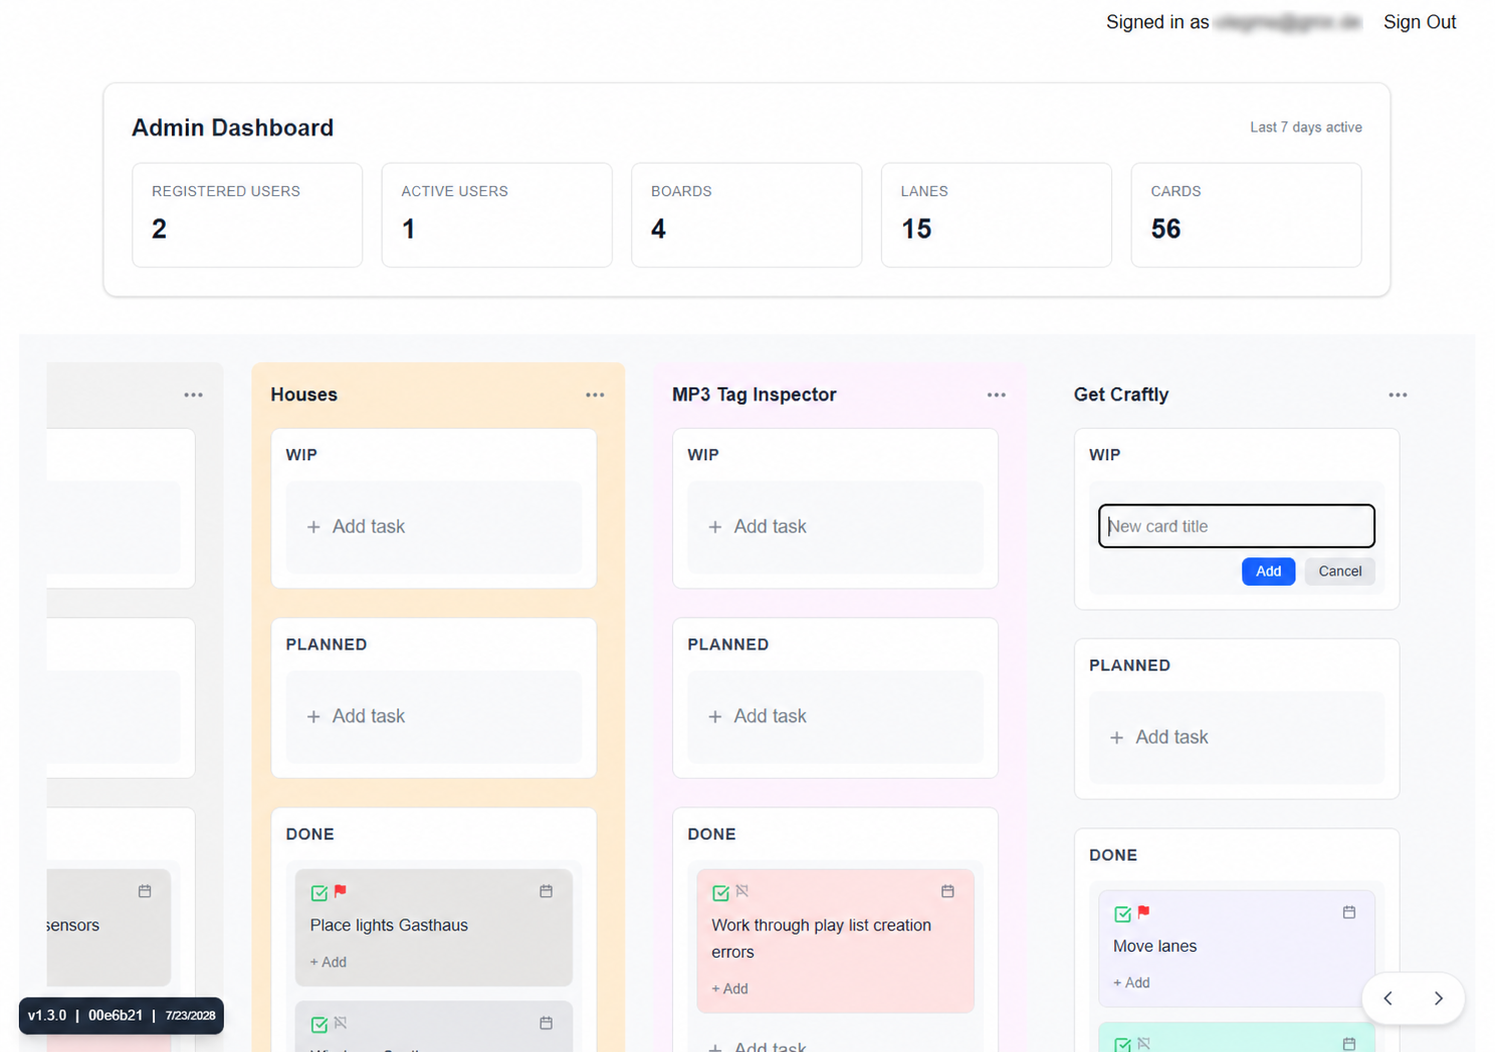
Pressing Add creates the card immediately. It receives a muted colour automatically and is persisted to Firestore, so the new state survives a refresh and appears on the user’s owned board.
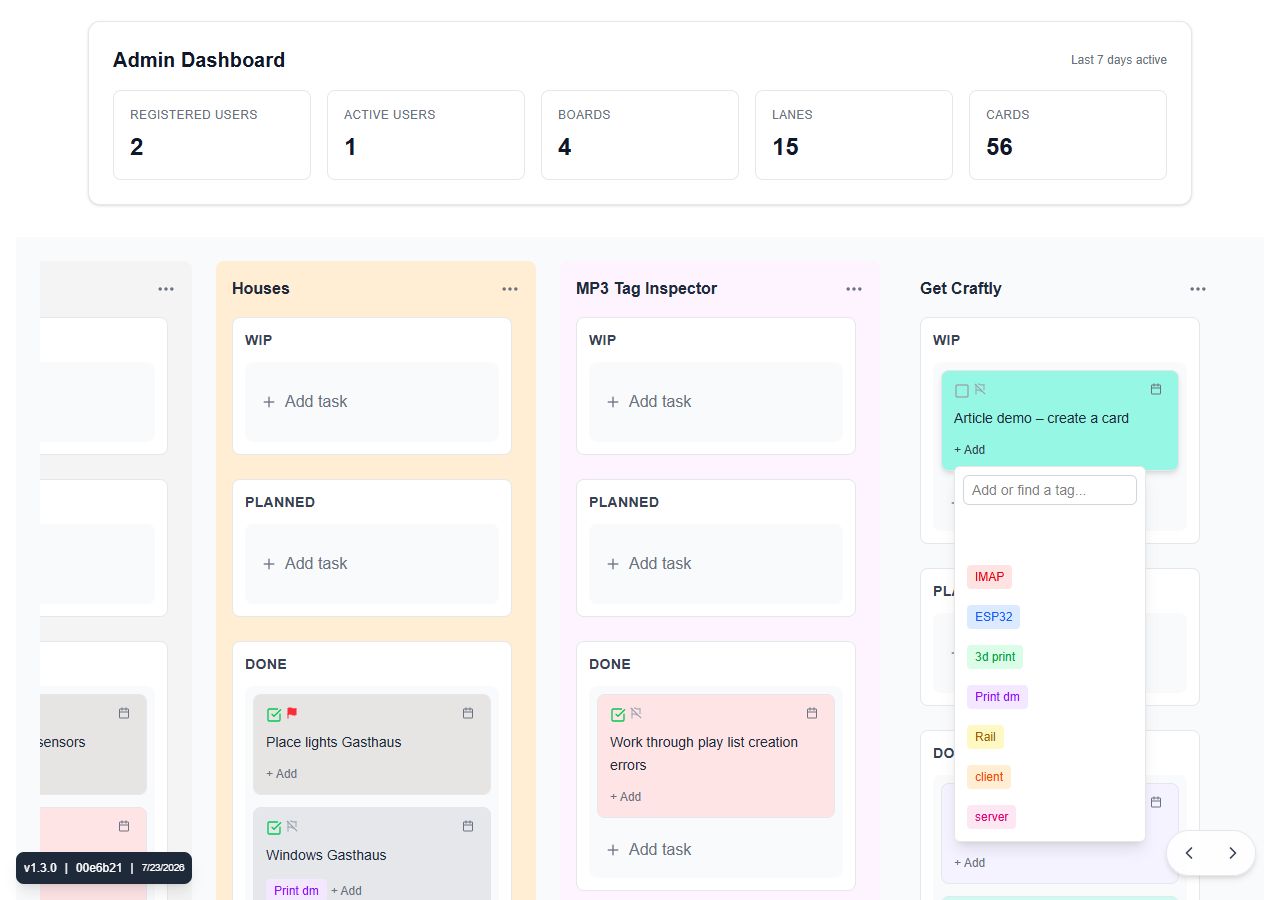
3. Add visual context
A minimal card can remain just a title, but richer work can be classified with reusable coloured tags. The selector filters existing tags and also supports creating a new one. Here I reused the ESP32 tag and enabled the high-priority flag.
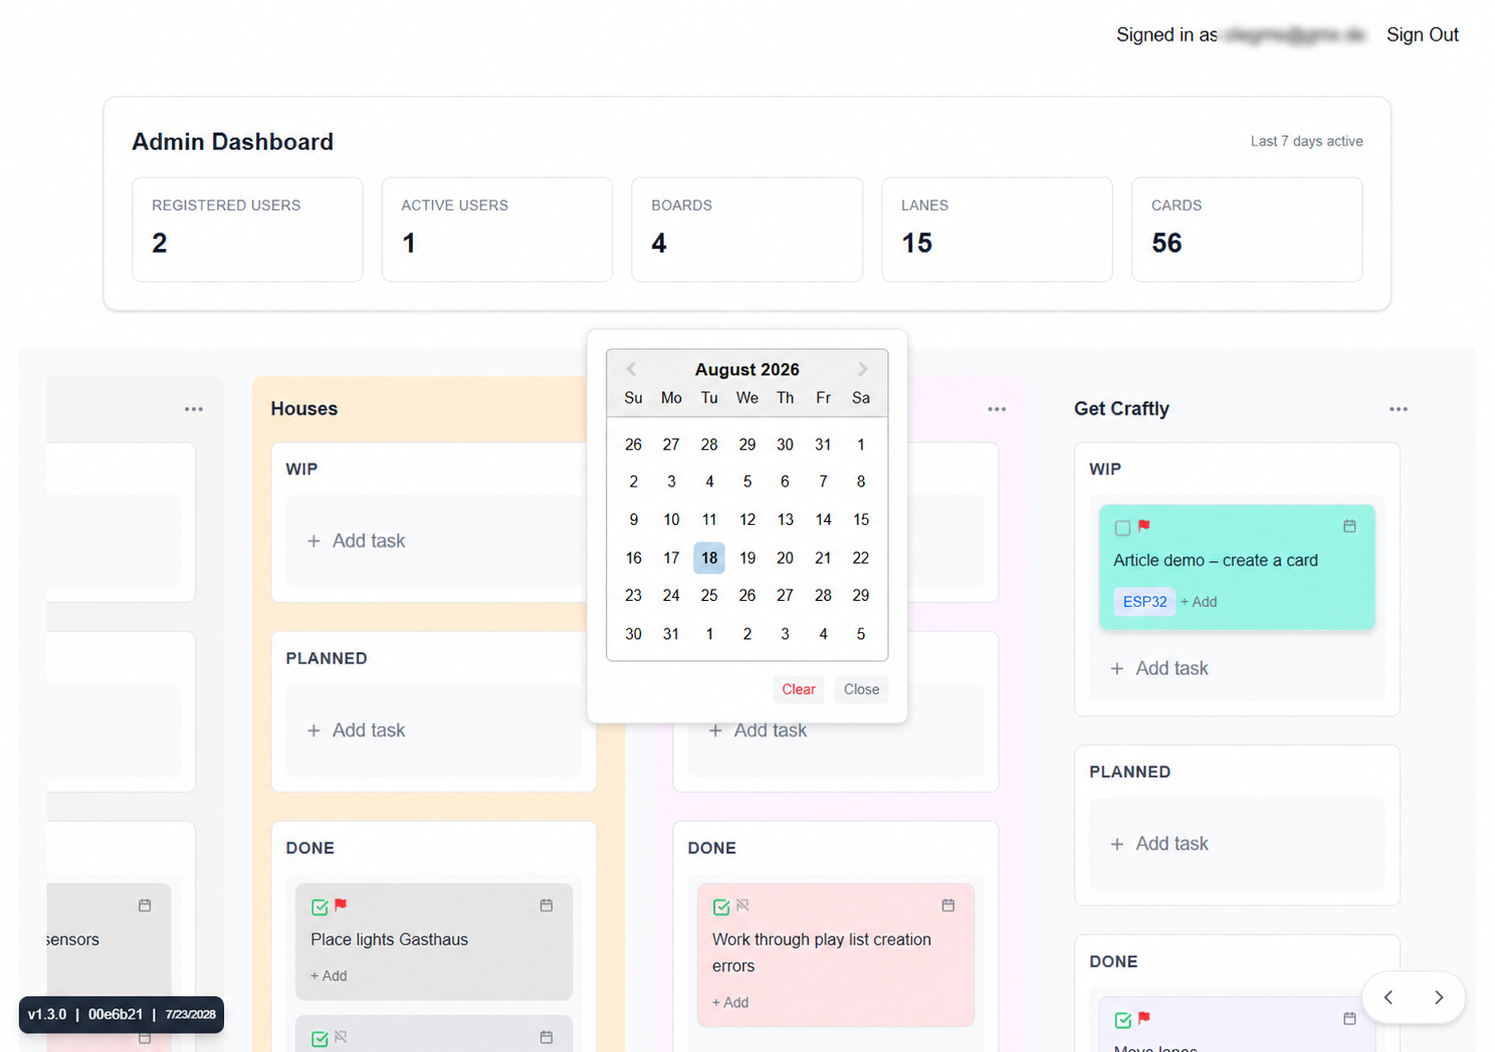
4. Choose a due date
The calendar icon opens a date picker over the board. It supports selecting a day or clearing an existing date without opening another page. For the demonstration card I selected 24 August 2026.
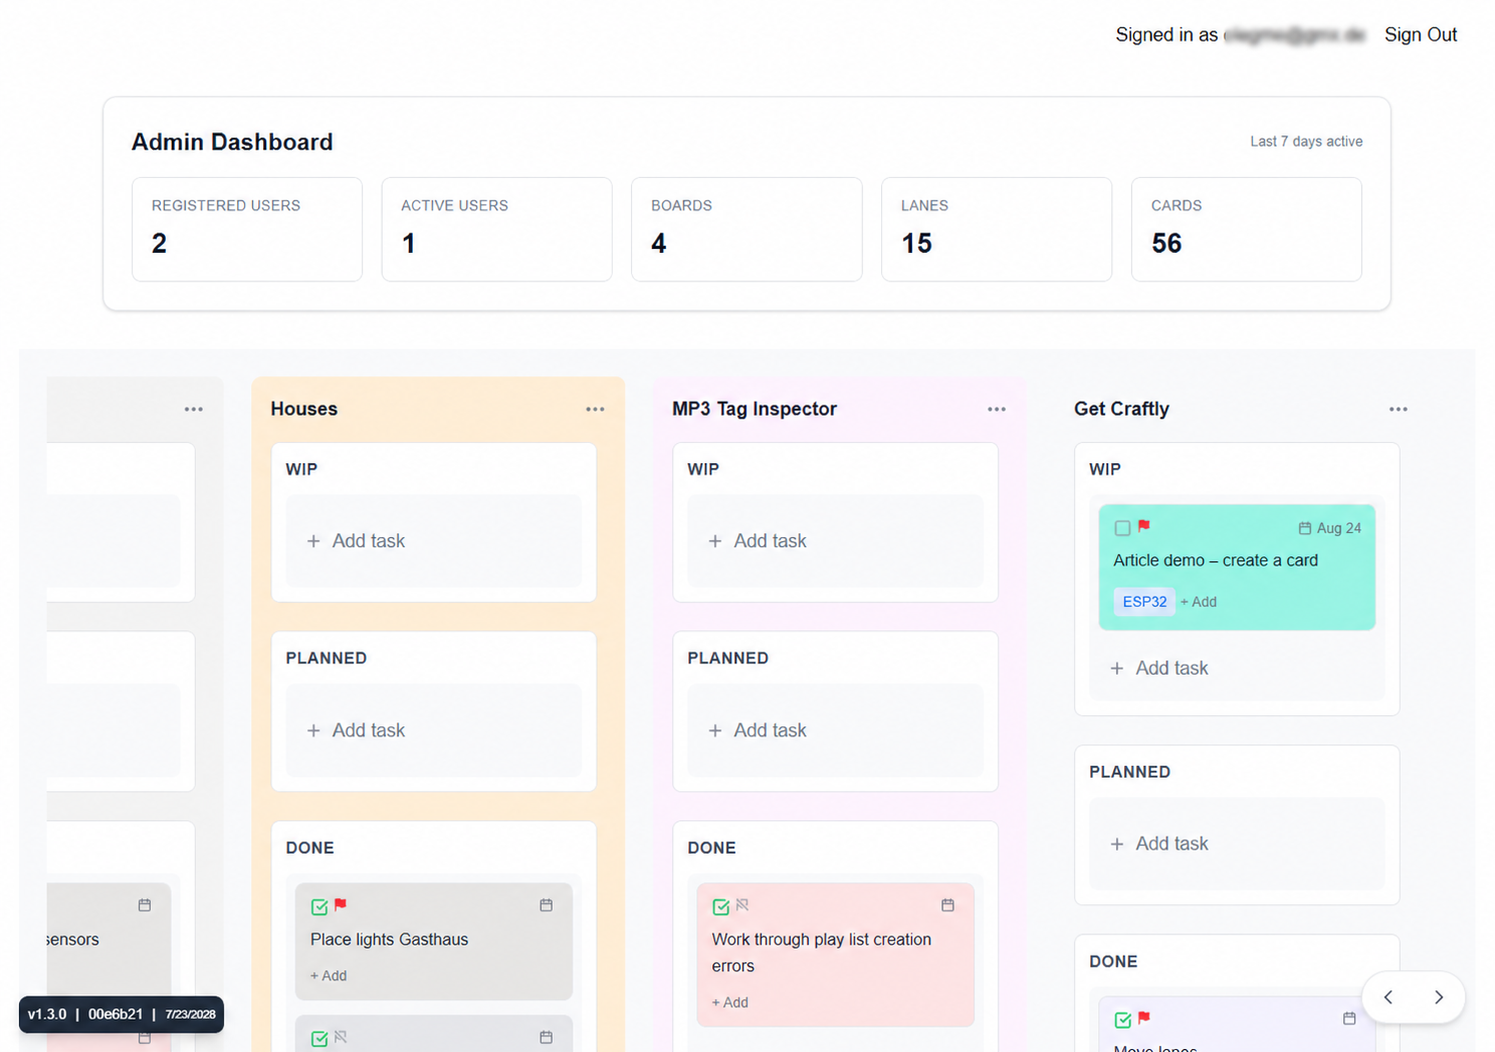
5. The configured result
The finished example combines the pieces without turning the card into a form: title in the centre, completion and priority at the top, due date on the right, and the tag below. Every change is saved as it is made.
From browser state to Firebase
The early prototype stored everything in React component state. That was sufficient for experimenting with the interface, but a refresh removed the work. The obvious next step was persistence.
Firestore now stores boards, lanes, rows, cards, ordering information, tags, colours, dates, and ownership. Firebase Authentication supports Google sign-in and email/password accounts. Each user receives an owned board, while claims-based rules protect administrative functionality.
This stage produced some of the less glamorous but most important fixes. Moving a card on screen was easy; making sure exactly the same move was persisted was harder. The same was true for adding lanes, changing priorities, updating dates, and preserving card order within priority groups. Most bugs appeared where local React state and Firestore state could briefly disagree.
How the project evolved
The current repository is public and contains the application source, Firebase configuration examples and rules, documentation, scripts, unit tests, and end-to-end tests.
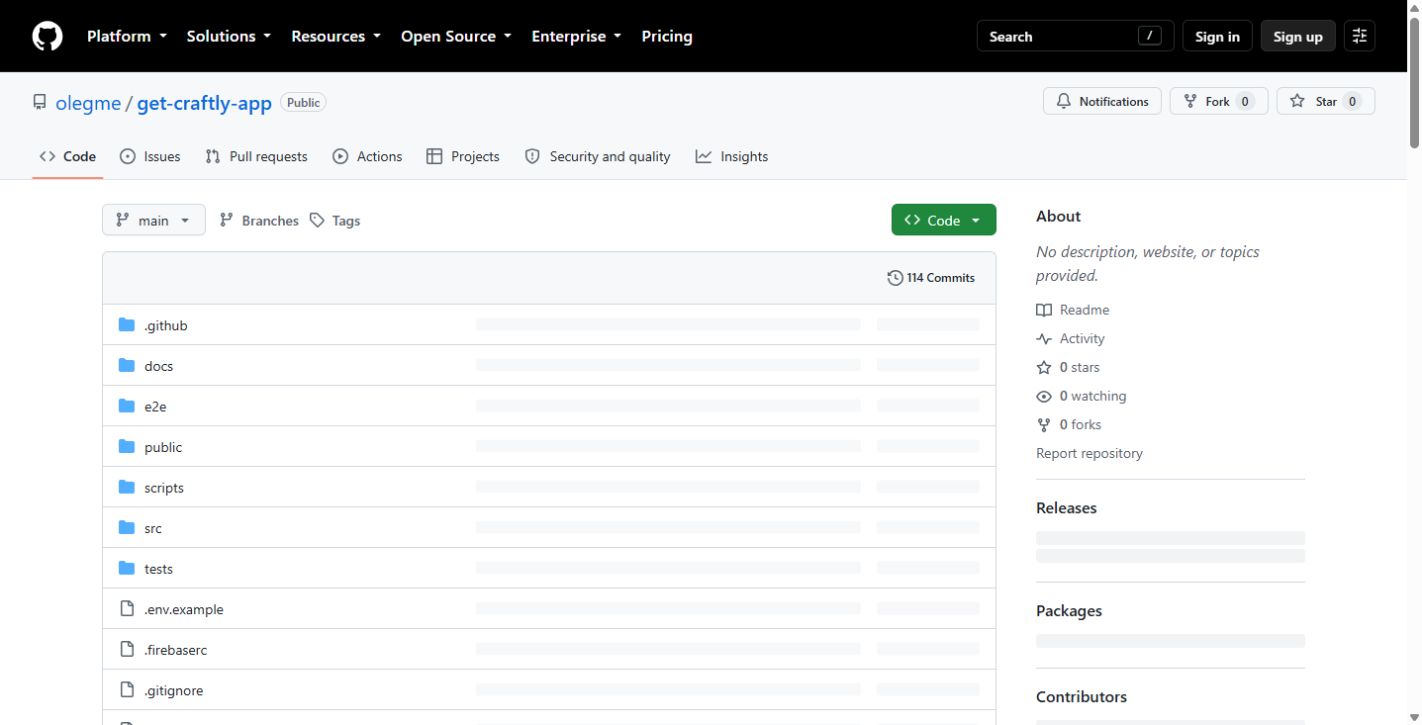
The code also moved beyond the original single large component. Board behaviour is now separated into reusable components and custom hooks. A dedicated API layer handles Firestore operations, while Playwright-based end-to-end coverage exercises important user flows.
The history is a good description of the development method: implement one behaviour, test it, discover what did not persist or did not feel right, and make the next focused change.
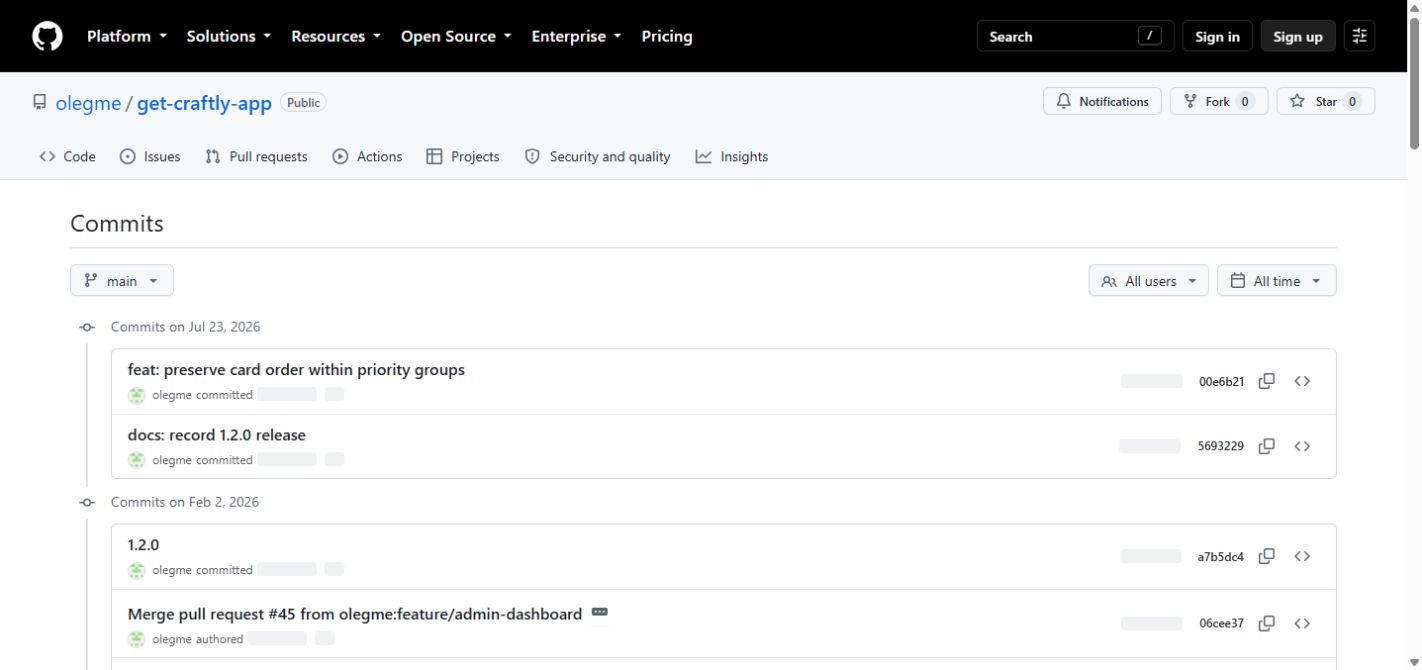
At the time of writing, the public repository contains 114 commits and 15 tags. The live footer identifies version 1.3.0 at commit 00e6b21, built on 23 July 2026. Recent work includes preserving card order within priority groups; earlier milestones added Firebase Hosting, authentication, the admin flow, rules, testing, and deployment automation.
The AI experiment
The project idea was not simply “make a Kanban board.” It was also “make it without manually coding it.” I had not used React or Tailwind and did not particularly want to stop and learn the complete stack before testing the idea.
Claude and Gemini handled the earliest steps. Later I also used Gemini CLI, GitHub Copilot, and Roo Code. I deliberately stayed with free LLM access rather than paid plans. The tools changed, but the working method stayed much the same: describe the required behaviour, inspect the result, reproduce the failure, and ask for a narrowly scoped correction.
This does not mean that the process required no work. The AI could write code, but it could not decide whether the application behaved correctly for me. Clear requirements, careful testing, source control, and small changes remained essential. The most useful skill was often not programming syntax but explaining precisely what happened and what should have happened instead.
Current result
Get Craftly is still a personal project rather than a commercial product, but it is no longer just a mockup. It is a deployed application that I use, with real persistence, authentication, board ownership, administration, and automated checks.
You can open the live application or inspect the complete source and development history on GitHub.